Creating a Word Style – how can I do this for in my Word documents?
![]() This week’s hint and tip is on creating a Word style. Styles are very useful hen creating documents and there are a number of defaults already available to be used. You can though create your own which allows you to have your own Word style that you can use which is unique to you. Styles are covered in our Advanced Word training course but we also decided to do a hint and tip on it. We are going to go through it now below.
This week’s hint and tip is on creating a Word style. Styles are very useful hen creating documents and there are a number of defaults already available to be used. You can though create your own which allows you to have your own Word style that you can use which is unique to you. Styles are covered in our Advanced Word training course but we also decided to do a hint and tip on it. We are going to go through it now below.
Styles in Word
The Style gallery on the Home Tab allows you to choose for example the Normal Style, No Spacing Style and one of the several Heading Styles useful in Table of Contents and Multi Level lists.

However it may be useful or even company policy to create your own Style and here’s how.
Creating your own style in Word
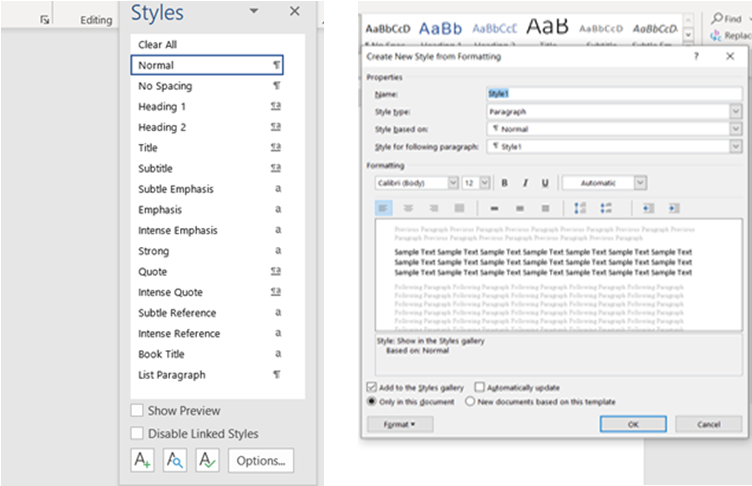
First click the DBL (dialogue Box Launcher) on the Styles gallery.

Click the first icon on the bottom (A with a +).

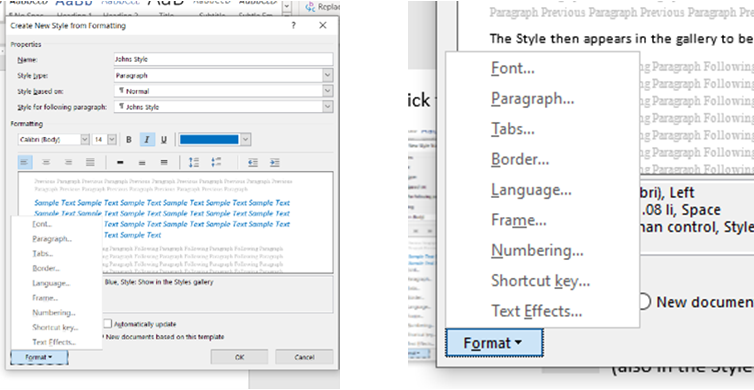
Type in a New Style Name and you can then select a whole variety of parameters including Font Size, Colour and the Format button (bottom left).
Then say choose Paragraph to choose line spacing.
The last selection you need to do is to decide whether this style will appear only for this document or have all new documents based on it (radio buttons at the bottom).
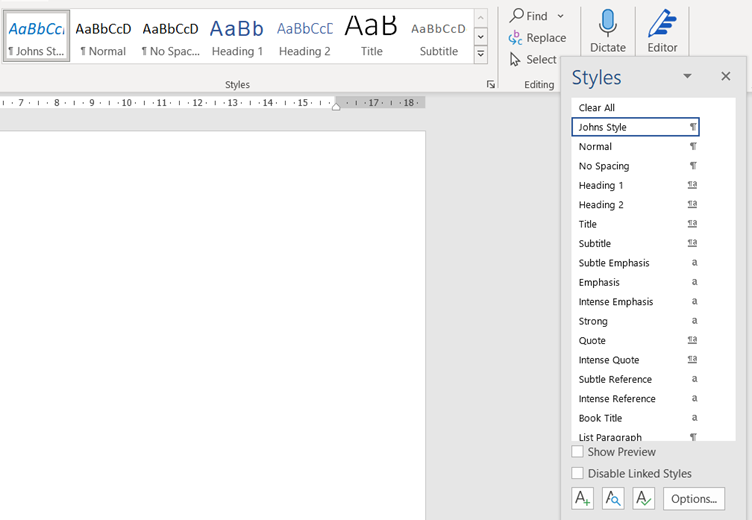
The Style then appears in the gallery to be used like any other (also in the Style Pane).

To remove the Style from the gallery simply right click Remove and from the Styles pane right click Delete.
We hope you liked this hint and tip on creating a Word style, why not take a look at our previous one on the different ways of using the advanced filter option in Excel?
For more blogs on Word please visit our website here.
