Drop Down List Content Box in Word – what is it and how can I insert it into my Word documents?
![]()
This week’s hint and tip is on the drop down list content box option in Word. In this hint and tip we are going over a control option you can insert into Word. The option we are covering in today’s hint and tip allows you to insert in a drop down list option in your Word document. We do cover something similar in our Intermediate Word training course but not this exact option. We are going to go through it now below.
Developer Tab
The content option we are looking at in this hint and tip is located on the Developer Tab. Often this Tab isn’t on your screen and so you sometimes you need to tick to show it. To make this tab visible, right hand click on the grey space on the ribbon on the Home Tab. From here, choose Customise the Ribbon. Down the list, make sure the box next to Developer in the list of Tabs is ticked. This will now make the tab visible at the top of your screen.

After the Tab has appeared at the top of the screen, the ribbon will come up with the Control options in the middle of it. This is where you will find the drop down list box option that we are going to insert into a table.
Drop Down List Content Box option
The option we are looking at is for inserting information into a table from a drop down list. Click into an empty cell in your table and then click on the Drop Down List Content Control option in the Controls section of the ribbon. This will insert the option into the cell.

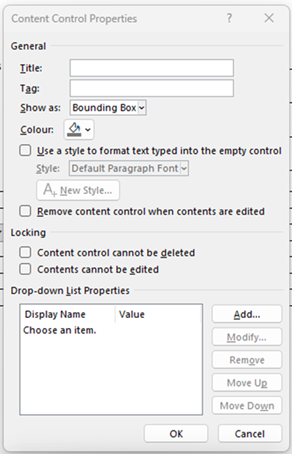
Once the option has been inserted into the cell, you can now edit the properties. Editing the properties of the drop down box allows you to be able to add in a title/tag. It also allows you to insert the options you want available for the drop down list to choose from.

To insert the options for the drop down list, you will need to click on the Add button. This will bring up a pop up window where you can type in all the options you want to be in your list. You will need to do this for each option.

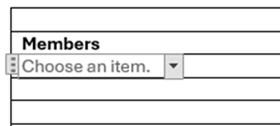
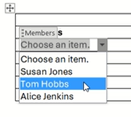
Once you have added all your choices and clicked OK, the cell will look like the screenshot below. You can now see that there is a heading title above the cell saying ‘Members’. When you then click on the drop down arrow, your list of options appears for you to choose from.

The video below demonstrates how to insert this feature in a Word document. This is an example of a control option that you can insert into a table in Word. Take a look below at the video to find out more and then try it out on your own computer!
We hope you have enjoyed this hint and tip on the drop down list content box option in Word. Why not take a look at our previous video hint and tip on using the grouping and hiding options in Excel?
