
Inserting Hierarchy SmartArt Diagrams in PowerPoint – how do I insert this type of SmartArt into a slide in my presentation?
![]() This week’s hint and tip is looking at inserting hierarchy SmartArt diagrams into a slide within the PowerPoint package. This is covered on our Basic PowerPoint training course but we also decided to do a hint and tip on it. We are going to go through it now below.
This week’s hint and tip is looking at inserting hierarchy SmartArt diagrams into a slide within the PowerPoint package. This is covered on our Basic PowerPoint training course but we also decided to do a hint and tip on it. We are going to go through it now below.
Inserting a Hierarchy SmartArt Diagram
Here we shall show you two ways you can insert a hierarchy SmartArt diagram into a PowerPoint presentation slide. SmartArt diagrams can be a useful way to visually demonstrate or explain something. Similar to shapes, but the ‘Smart’ part allows them to automatically adapt and change as you add to or remove from it.
First Way – using the Insert Tab
Here we will go through the first way to insert a cycle SmartArt diagram. This is through the use of the Insert Tab.
Firstly, insert a new slide into your presentation and choose the Title Only slide layout or blank if you don’t need a Title box.
To insert a SmartArt diagram, click on the Insert Tab and then click on the SmartArt button on the ribbon.
![]()
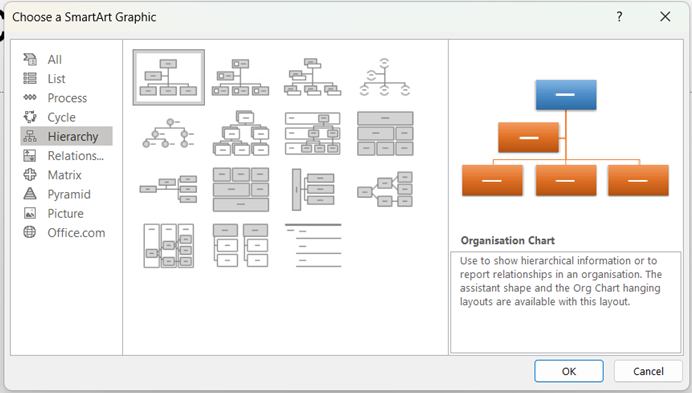
After you have clicked on this button, a pop up window below should appear on your screen. From here click on the hierarchy option from the list that appears on the left hand side. From the list, choose the Organisation Chart option and then click OK.
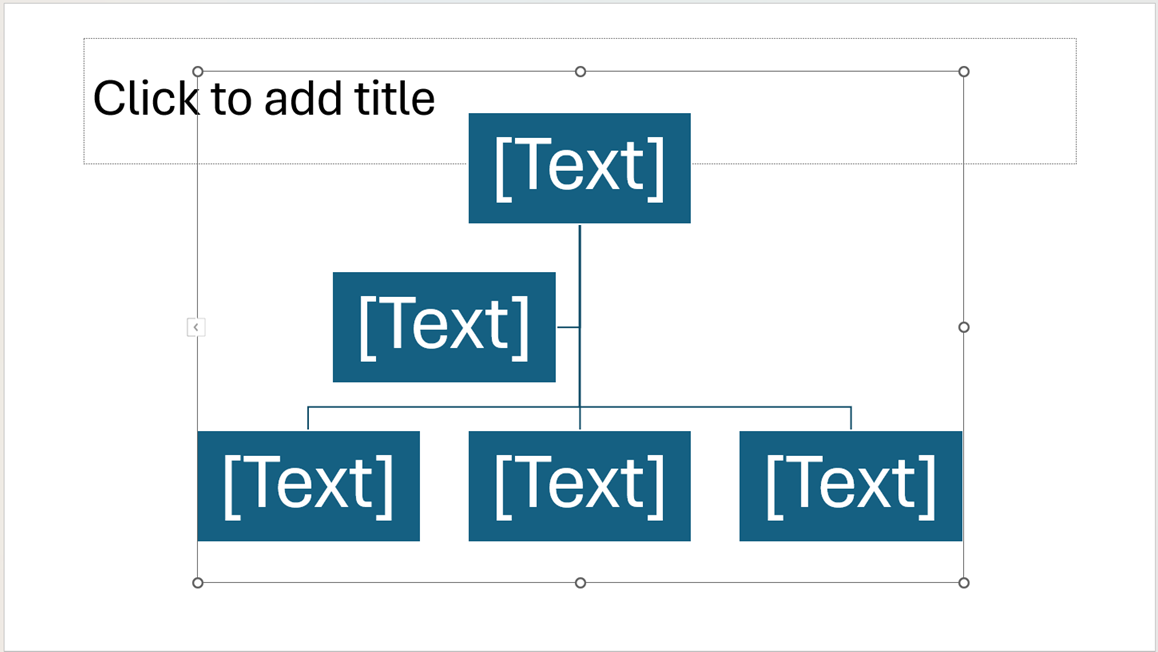
A SmartArt diagram will then be inserted into your presentation for you. Now that it is on the slide, you can resize it so that it fits in the slide under the title box. From here you can edit the text by clicking on the text pane option on your ribbon or by selecting a box and typing in it. This will bring up a pop up box where you can then edit the text. We will cover how to add shapes further down in the post
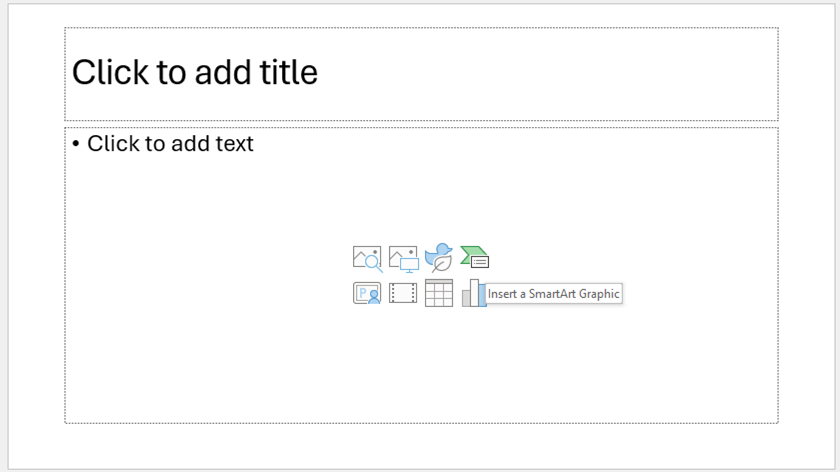
Second Way – Using the Insert a SmartArt Graphic option in the content box
This second way will show you how to insert a hierarchy SmartArt diagram through the use of the content box on your slide. This content box is useful as it has several icons that you can use to insert something into your slide. In this example we are going to use the insert SmartArt graphic icon.
In the content box on your slide, hover over the 4th icon on the first row (the words Insert a SmartArt Graphic should appear when you hover over it).
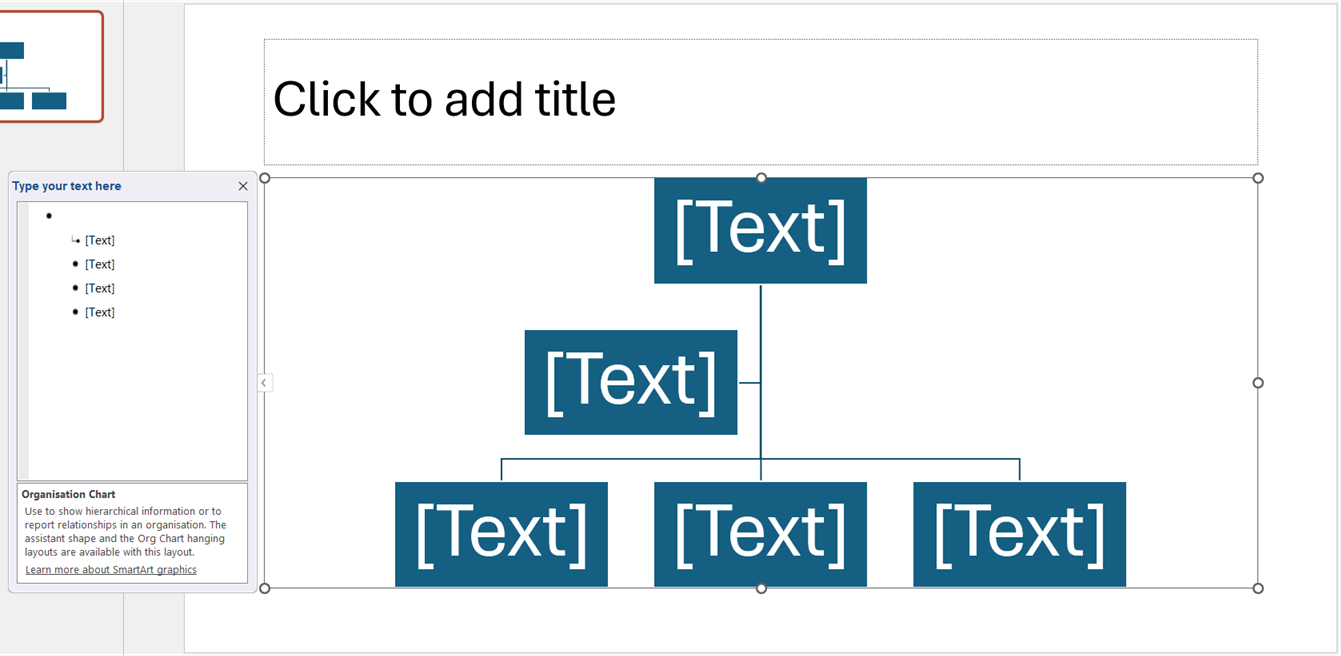
Click on the icon and a pop up window will appear with options of SmartArt graphics to choose from as it did in the first way mentioned above. From here, follow the same steps as covered above in the first way to choose the SmartArt graphic and insert it into your slide. Same as previously, we will go through adding shapes further down in the blog post.
Adding shapes to a SmartArt graphic
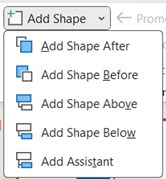
Once you have inserted the diagram, you can now add in extra shapes to your diagram. To add a shape to your diagram, firstly select a shape in your diagram and then click on the ‘Add Shape’ button on the SmartArt Design Tab. To see all the options available for adding in shapes, click on the drop down arrow next to the button.
For the hierarchy diagram there are a few more options you can choose from. For this type of diagram you are able to add a shape before or after, above or below and also assistant. Before or after, will insert a shape to the left or right of the one you selected in the diagram. Above or below, will insert a shape above or below the level of the shape you have selected in a diagram. Finally assistant will add an assistant shape to the shape that you have selected.
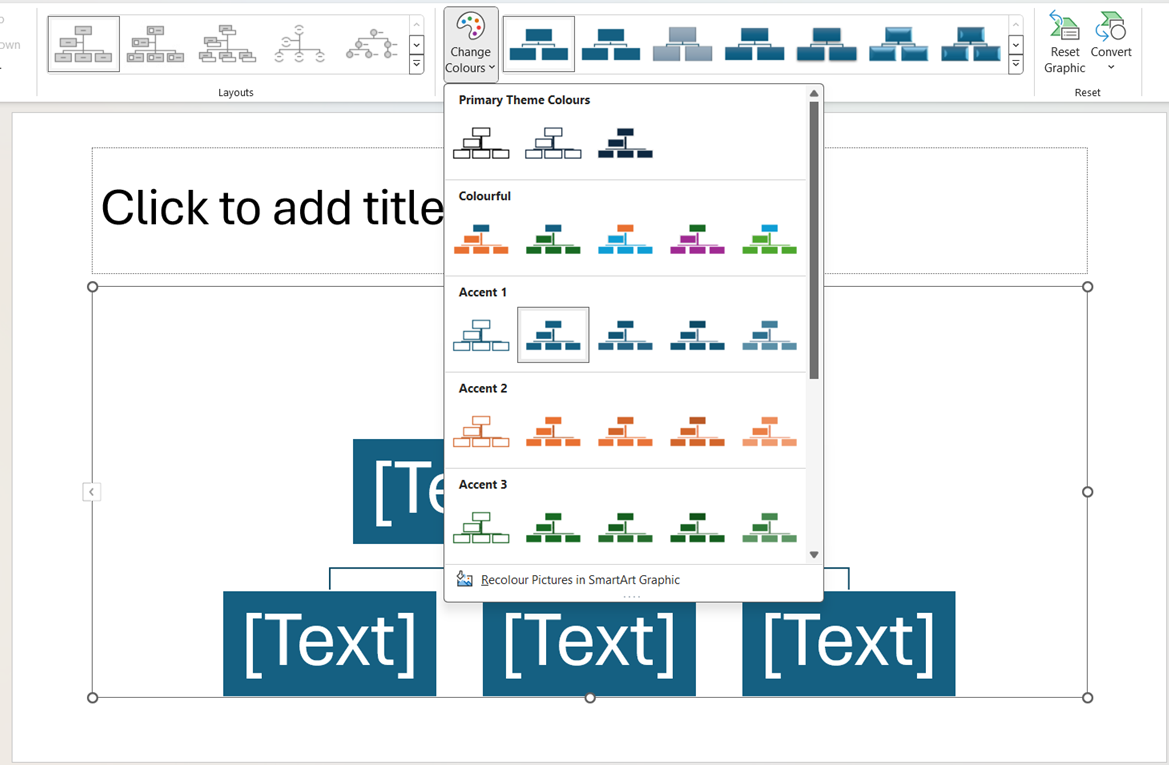
Formatting a SmartArt graphic
Once you have inserted the SmartArt graphic, you can then format it. You can format the appearance of the graphic by changing the colours used by using the SmartArt Styles gallery or by clicking on the Change Colours button on the ribbon on the Chart Design Tab. You are also able to manually format it by using the Format tab.
The video below shows how to insert the hierarchy SmartArt diagram using the ways mentioned above in your PowerPoint presentations. SmartArt diagrams are a great tool to use to display processes or data in a more visual way.
Take a look below at the video to find out more and then try them out on your own computer!
We hope you have enjoyed this hint and tip on inserting hierarchy SmartArt diagrams in PowerPoint. Why not take a look at our previous video hint and tip on how to insert a cycle SmartArt diagram in a presentation in PowerPoint?